Saturday, October 12, 2013

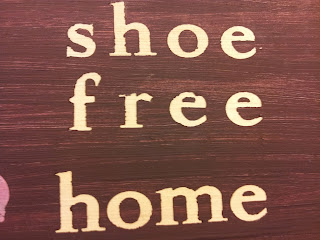
DIY - Shoe Free Home Plaque

"SHOE FREE HOME" Plaque

After tons of research looking for a sign or doormat that "kindly" indicates that we don't wear shoes in our home, I decided that I would have to make my own.  There are several products out there, but they just don't represent our "style".  

With a few items that I had laying around the house, I was able to make this plaque.  It sits outside on the porch next to the front door.  It is very visible to our visitors.  And since having it, our guests come in and remove their shoes without an awkward request from "Mama Love" (me).


This project didn't take very long.  It took more time to dry than anything.

Step 1:  Add letter stickers (from Dollar Tree) to a scrap piece of 2x6.  I like the term "shoe free home" rather than some others I have seen that say "remove your shoes".


Step 2:  Use craft paint to paint the base for the plague. 
 As you can see, the stickers cover the natural wood.

(Take your time putting the stickers on. And make sure they are leveled.  Otherwise, your finished project will look like mine.  I call it the "freehand look", but it's really because I was too lazy to take the extra step.)


  Once the stickers are removed,
 the natural color of the wood will show through the base color.
  Another option would be to paint a coat of paint,
 then put the stickers on,
 and then another color on top of the the entire plaque for a two tone base.


Step 3:  Allow the plaque to dry.  
I was impatient so I used a hair dryer to speed up the process.


Step 4:  For my design, I wanted to use feet.  
First, I mixed the burgundy craft paint with white paint and washable kids paint (red).


Step 5: I painted the bottoms of my 2 daughters' feet with the paint I made.
I pressed their painted feet on the plaque.


Step 6:  I wanted to add a little more detail to the plague.  
I used a stencil and the color I made to add for this detail.


Step 7:  Allow the plaque to dry.  
Again, 
I was impatient so I used a hair dryer to speed up the process.


Step 8:  Remove the stickers to reveal the natural wood.


TADA!!!!  That's it!

So, what do you think?


Thursday, October 3, 2013

All Natural Mosquito Repellent

You see recipes for mosquito repellent all over Pinterest.  So I wanted to give it a try.

I LOVE THIS STUFF!   It is very light on the skin.  It is not oily and works pretty well.  I do tend to make sure that I reapply often because I am paranoid about bug bites.  But it lasts for about an hour (in my opinion).

This is simple to make, once you gather all of the ingredients.  I purchased my oils online from Puritans Pride and Vitamin Shoppe. I purchased the other ingredients locally at Walmart and Walgreens.

Here's what I did:

Since essential oils should be stored in dark containers, I bought a spray bottle of peroxide (it's brown) and emptied and rinsed it out.  I added the following ingredients:

 1 cup Distilled Water
 1 cup Witch Hazel
 1 tsp Glycerin 
30 drops - Citronella Oil 
15 drops - Lemongrass Oil
15 drops- Cedar Oil

Next, shake it up and spray it on.  You're all set!


Here's my recipe and how to video on my hubby's Youtube Channel:  HomeProjectLogic


All Natural Mascara - 1st Attempt

These are my notes from my 1st attempt of All Natural Mascara.

Hopefully, you will be able to follow what I did and make improvements or suggestions as to how I could make it better.  I am somewhat satisfied with the end product.  I will definitely be researching for way to thicken the mascara as well as looking for ways to change the color. I would prefer a dark brown mascara.  But overall, I am proud my first attempt at making my own mascara.
Anywho.....here are my notes.

What you would need:

Coconut Oil
Activated Charcoal   (I used Charco Caps - They are in the pharmacy section in Walmart for $3.94)
Old Mascara bottle
Rubbing Alcohol
Soap and Water
Dark Cloth
Qtips

Getting the old mascara out
This is my first attempt at making all natural mascara. The first thing I did, was to round up all of my old mascara bottles. I opened them and removed the cap that's inside the bottle that is made to slow down how much mascara comes out the brush. I'm sorry I don't know what this cap is called. However, it was easier to remove it with a needle nose pliers then to remove it with my fingernails.  Later, my husband came in and removed them with his fingernails and said I needed a man.  LOL.  Well, yes, but my nails are too long for such a task.

 The next step was to wash the interior of the bottles with soap and water. I let them soak in hot water for a little while after washing them with soap and water. Then, I washed them with soap and water again. These bottles are very messy. The next thing I did was to soak the bottle with alcohol in them. I wanted to do this to make sure that there's no bacteria in a bottle before starting with the new mascara. I soaked the brushes in alcohol is well. Don't forget to wash underneath the cap that holds the brushes. I used Qtips.

My next step was to make a label for my bottles. You don't have to do this,,,I am just OCD like that.

Now was the fun part.  After the bottles were dry,  I spread a dark cloth napkin and laid out my used and newly labeled mascara bottles out.  I poured about 1/4 teaspoon of coconut oil into one empty mascara bottle.  Then I cut the tip of 6 charcoal tablets and poured the powder into the bottle with the oil.  After each capsule, I used the brush and mixed the oil and powder.  I also was testing for the thickness of the mascara. And that's it!

It was VERY messy but I think it came out okay.  I can't complain too much.  The cost for this mascara came to $1!  

Here is how it came out.  Excuse the puffy eyes...been up since 4am.  :)

With mascara

No Mascara